Ajanta Caves Photography Guide – Capture Timeless Art Like a Pro
The first time I walked into the dimly lit Ajanta Caves, camera in hand, I didn’t take a single shot for almost ten minutes. The stillness, the scent of stone, and the soft, golden light filtering through the cave arches felt sacred. Photographing this place isn’t just about exposure or focus — it’s about patience, presence, and respect for 2,000 years of human creativity.
In this Ajanta Caves Photography Guide, I’ll share practical tips, the best times for light, how to handle low-light conditions, and personal insights I’ve learned after multiple photography trips to this world-famous heritage site near Aurangabad.
1. Why Photographing the Ajanta Caves Is Special
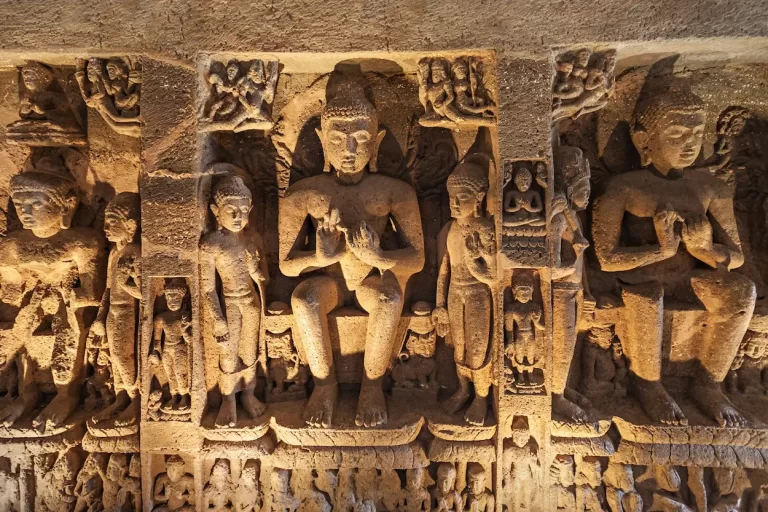
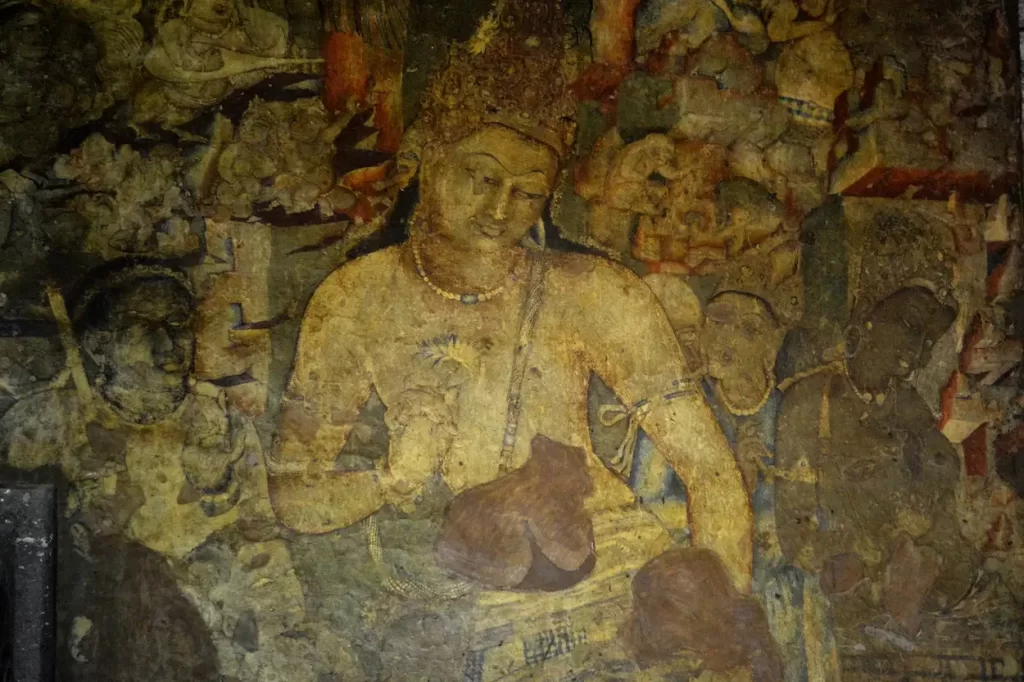
Every frame inside these caves tells a story — not just of Buddha, but of art, emotion, and craftsmanship. The Ajanta Caves photography experience is unlike anywhere else in India because:
- The murals use only natural pigments and age-old techniques.
- The light inside changes minute to minute, creating natural drama.
- The atmosphere forces you to slow down — and observe before you shoot.
💡 Tip: Take a few minutes to adjust your eyes before you start shooting inside the caves — it helps you see colors and details better.
2. Camera Rules and Permissions
Before unpacking your gear, remember that Ajanta is a protected UNESCO site under the Archaeological Survey of India (ASI). You can take photos, but there are rules.
✅ Allowed:
- Handheld cameras and smartphones.
- Photography without flash.
❌ Not Allowed:
- Flash photography (it damages ancient pigments).
- Tripods or large rigs (without prior permission).
- Drone photography.
💡 Tip: Flashlight use is fine for personal viewing, but never shine it directly on the murals while shooting — it distorts color tones.
3. Best Time of Day for Photography
| Time | Lighting | Ideal For |
|---|---|---|
| 8:30 – 10:30 AM | Warm golden sunlight enters cave entrances | Interior murals & Buddha statues |
| 11:00 – 1:00 PM | Bright but harsh | Outer cliff shots, panoramic views |
| 3:30 – 5:00 PM | Soft indirect light | Cave exteriors & valley reflections |
💡 Tip: Morning light works best for photographing inside Caves 1, 2, 16, and 17 — the murals glow naturally.
4. Recommended Photography Gear
You don’t need the most expensive setup — just the right combination of tools:
📸 Camera Body: Mirrorless or DSLR with good low-light performance.
🎞️ Lens: 24–70mm f/2.8 (perfect balance of range and light).
📱 Smartphones: Use Pro mode to manually adjust ISO and white balance.
💡 Accessories:
- A mini beanbag or grip pod (since tripods are restricted).
- Microfiber cloth (dust can build up quickly).
- Polarizing filter for exterior shots.
💡 Tip: Keep ISO between 800–1600 for interiors — anything higher adds grain in low light.
5. Understanding the Light Inside Ajanta Caves
The Ajanta Caves photography challenge lies in the interplay of shadow and light. Since most caves are lit only by sunlight from the entrances, the interiors can be dim — but that’s where the magic is.
- Caves 1 & 2: Soft morning light enhances warm pigments.
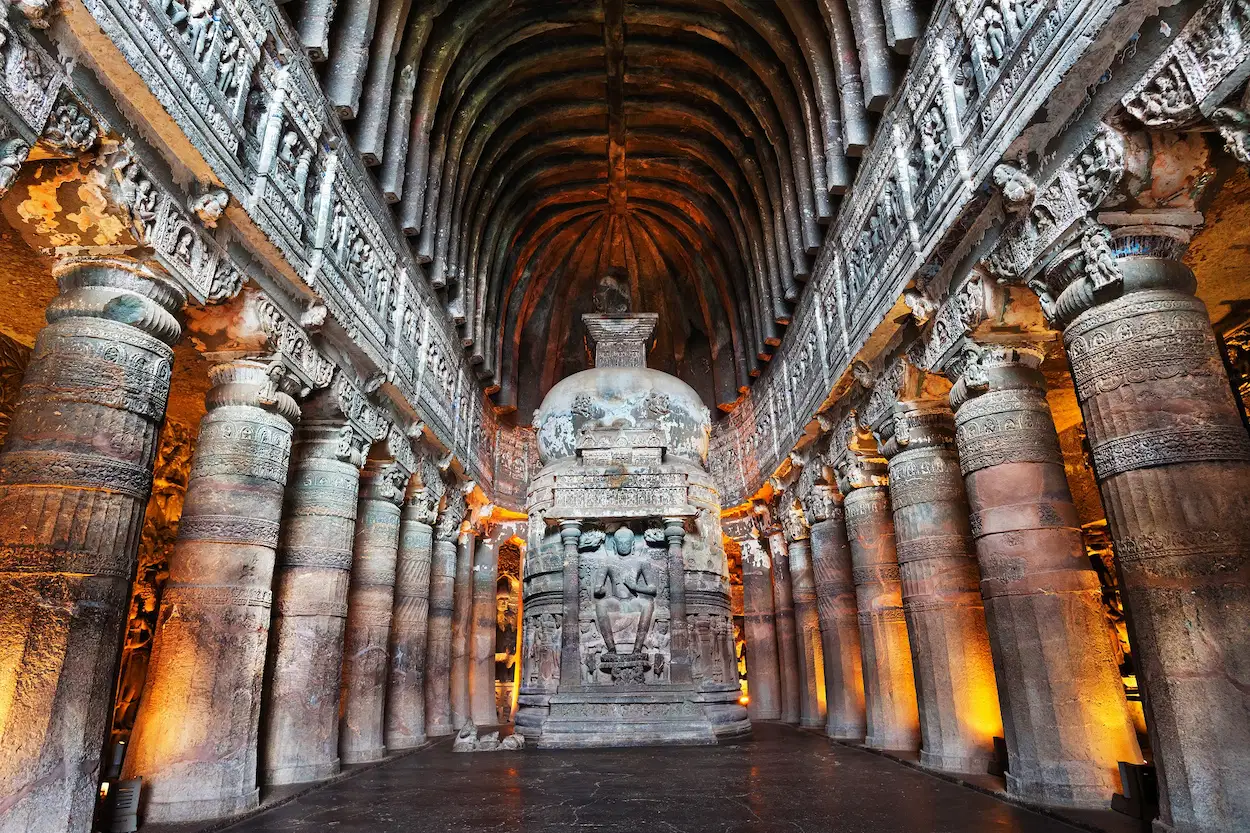
- Caves 16 & 17: Bright at noon; perfect for detailed murals.
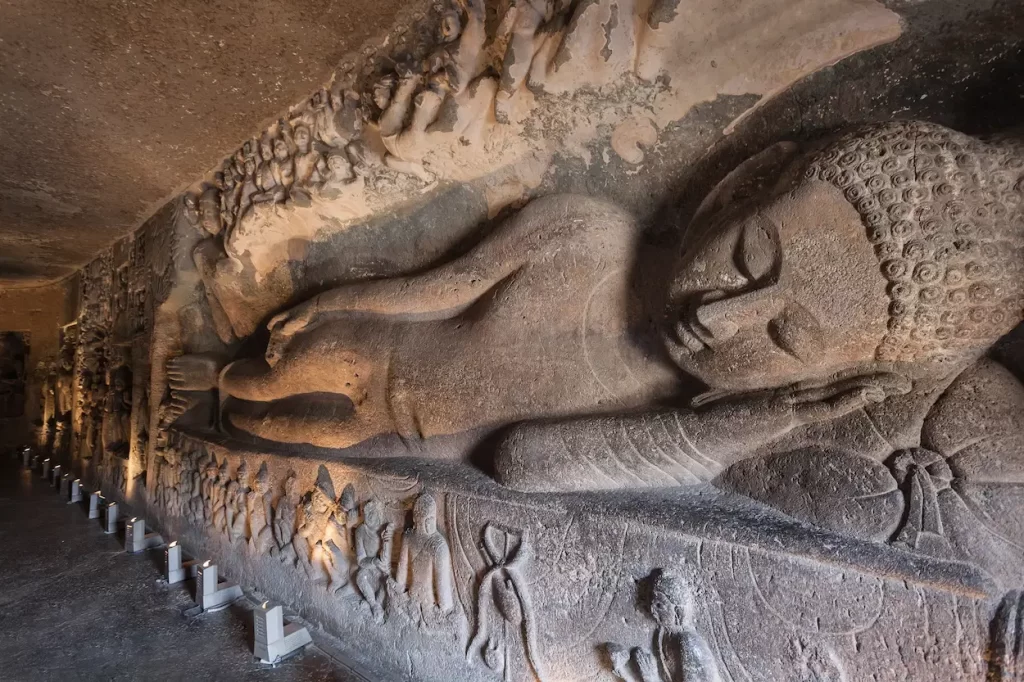
- Cave 26: Best during mid-morning; light falls directly on the Buddha statue.
💡 Tip: Don’t overexpose — underexposed images can be brightened later in editing, but highlights can’t be recovered.
6. Capturing Murals Without Flash
These murals are fragile — but if you master your settings, you can capture their beauty naturally.
📷 Suggested Settings:
- Mode: Aperture Priority (A/Av)
- Aperture: f/2.8 – f/4
- ISO: 800–1600
- Shutter Speed: 1/30 – 1/60 (handheld stability needed)
- White Balance: 3200–4000K for warm tone balance
💡 Tip: Use your camera’s spot-metering function to expose for the wall art, not the cave entrance — this keeps mural details crisp.
7. Composing the Perfect Shot
Ajanta isn’t about symmetry — it’s about emotion. Try capturing the feeling of the place rather than just its form.
🎯 Ideas for great compositions:
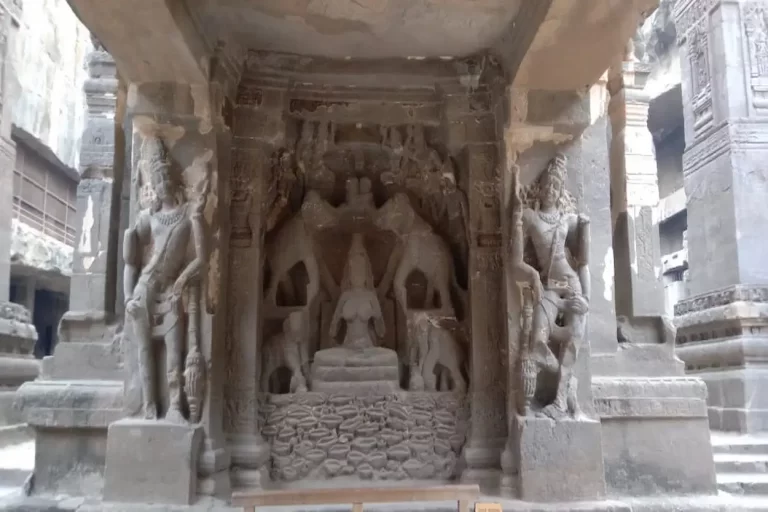
- Frame the entrance light falling on a Buddha statue.
- Include human silhouettes for scale.
- Use reflections from the stone floors.
- Focus on details — hands, eyes, lotus motifs.
💡 Tip: Step back — sometimes, the full wall tells a better story than a close-up.
📍 View on Google Maps
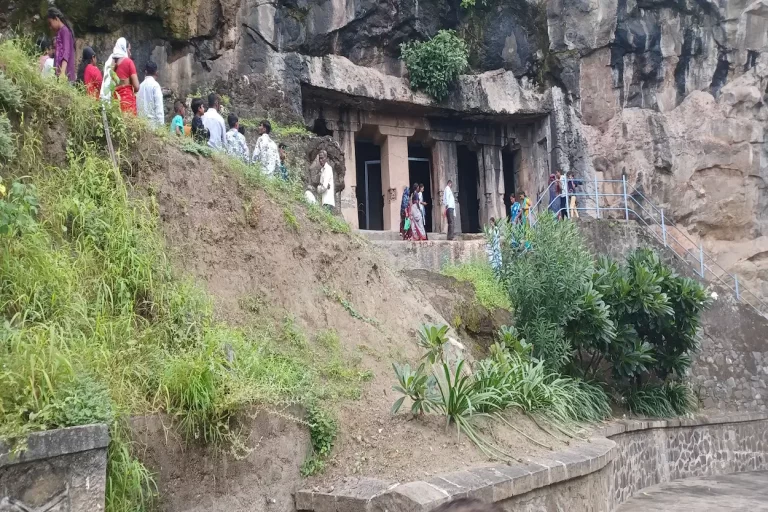
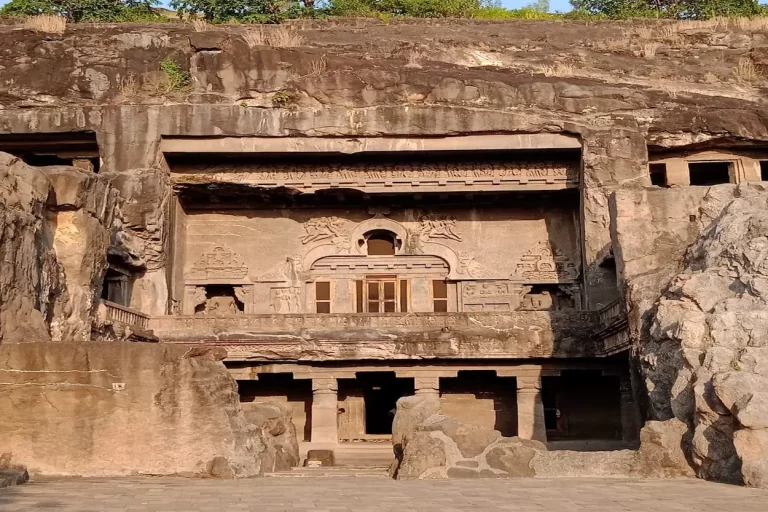
8. Outdoor Photography Spots Around Ajanta
The area around the caves offers some of the best natural landscapes in Aurangabad district.
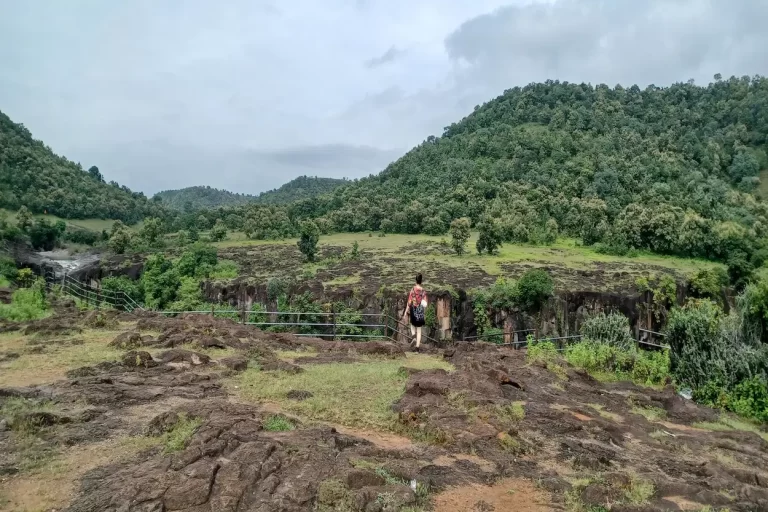
📍 Top Outdoor Spots:
- Ajanta Viewpoint (Cliff Trail): Panoramic view of the entire horseshoe valley.
- Waghora River Bend: Best for reflections after monsoon.
- Cave 9 Hill Trail: Ideal for wide-angle shots of cave entrances.
💡 Tip: Climb the viewpoint trail around 4:30 PM for sunset shots — the golden light makes the cliffs glow.
9. Etiquette & Respect While Shooting
Ajanta is not a photo studio — it’s a sacred, historical site. Always photograph with awareness.
✅ Do:
- Stay silent while others are meditating or exploring.
- Move slowly to avoid blocking light or pathways.
- Share photos with local guides — they love seeing your results.
❌ Don’t:
- Use flash or touch walls.
- Rest your camera on ancient surfaces.
- Use loud shutter clicks in enclosed areas.
💡 Tip: Capture moments quietly — Ajanta rewards those who listen more than they shoot.
10. Editing Tips for Ajanta Photos
When you get home, remember — Ajanta’s colors are naturally muted and earthy. Keep post-processing light and respectful.
🧭 Editing Tips:
- Use minimal saturation; enhance contrast slightly.
- Adjust white balance toward warmer tones.
- Sharpen carefully — overdoing it creates grain.
- Preserve the natural shadow depth.
💡 Tip: Try black-and-white versions for dramatic compositions of pillars and statues — the light plays beautifully.

11. My Favorite Photography Experience at Ajanta
One winter morning, I waited for sunlight to touch the face of the reclining Buddha in Cave 26. For a few seconds, the light caught his lips and eyes — the stone looked alive. I didn’t click right away. I just watched. When I finally did, I realized that the photo wasn’t just an image — it was a quiet conversation across centuries.
💡 Tip: Don’t chase shots; let the moment find you. The best frames at Ajanta are born from patience.
Personally Tested Best GetYourGuide Tours
👉 Related Posts You Might Like:
- Ajanta Caves Travel Guide
- Photography Spots in Aurangabad City
- History and Architecture of Ajanta Caves
- Ajanta Caves Paintings You Should Not Miss
- Best Time to Visit Ajanta Caves for Tourists
Frequently Asked Questions (FAQ)
Q: Is photography allowed inside the Ajanta Caves?
A: Yes, handheld photography is allowed, but flash and tripods are prohibited to protect the murals.
Q: What camera settings are best for photographing Ajanta Caves?
A: Use low aperture (f/2.8–f/4), ISO 800–1600, and no flash. Natural light works best during the morning hours.
Q: Which caves have the best murals to photograph?
A: Caves 1, 2, 16, and 17 have the most vivid and detailed paintings for close-up photography.
Q: Can I use a tripod inside the Ajanta Caves?
A: No, tripods are not allowed without special ASI permission. Try using a mini beanbag for stabilization.
Q: What is the best time of day for Ajanta Caves photography?
A: Between 9:00 and 11:30 AM, when sunlight enters the caves naturally and enhances mural colors.