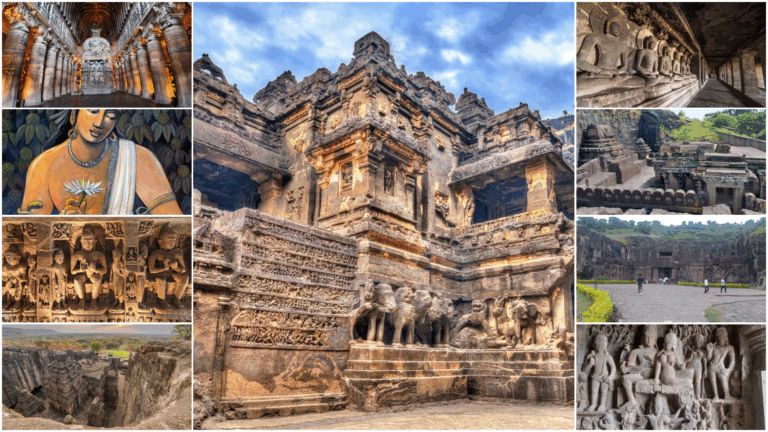
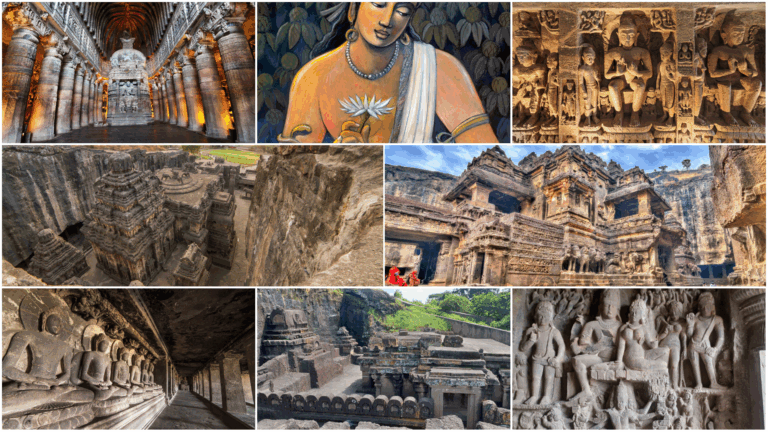
Ajanta Caves Photography Guide 2026 – Best Light, Timing & Tips
Ajanta Caves photography rewards preparation more than equipment. The paintings inside are 1,500 years old, lit by fiber-optic light, and photographed under strict rules. The exterior cliff face is one of the most extraordinary architectural subjects in India — but only in specific light. This guide tells you exactly what is allowed, what works, and when to be there.
Photography Rules at Ajanta Caves — What Is and Is Not Allowed
Before anything else — the rules. Getting these wrong means your equipment gets confiscated at the cave entrance.
Allowed:
- Mobile phones — still photography, no flash
- Digital cameras (DSLR, mirrorless) — still photography, no flash
- Video on mobile phone — permitted in general areas and cave exteriors
Strictly prohibited:
- Flash photography — inside all caves, no exceptions. ASI security enforces this at every cave entrance.
- Tripods — prohibited inside all caves and on the cave pathway
- Professional video equipment, cinema cameras, commercial filming rigs — require separate ASI permission and are subject to additional fees
- Selfie sticks inside caves — discouraged and in some caves actively prohibited by guards
The reason behind the rules:
The mineral pigment paintings on lime plaster are sensitive to light intensity and heat. Flash photography — even from a single camera — generates a brief burst of high-intensity light that, repeated thousands of times per day across hundreds of visitors, causes measurable cumulative damage to the pigments. The ASI fiber-optic cool lighting is specifically designed to illuminate the paintings at the minimum necessary intensity. This is not bureaucratic caution — it is the reason the paintings still exist.
💡 Tip: If a guard at a cave entrance asks to check your camera settings, cooperate fully and show them your flash is off. The guards at Ajanta are serious about this rule and a confiscated camera for the rest of the day ruins the visit. Turn flash off before you board the Eco-Bus — not at each cave entrance.
The Two Completely Different Photography Challenges at Ajanta
Ajanta presents two photography environments that require completely different approaches — and most visitors do not realize this until they are already inside.
Challenge 1 — Exterior photography:
The cliff face, cave facades, carved doorways, and the horseshoe gorge panorama. This is standard travel photography — bright Indian daylight, architectural subjects, wide angles. The challenge is light direction and crowd management, not technical difficulty.
Challenge 2 — Interior photography:
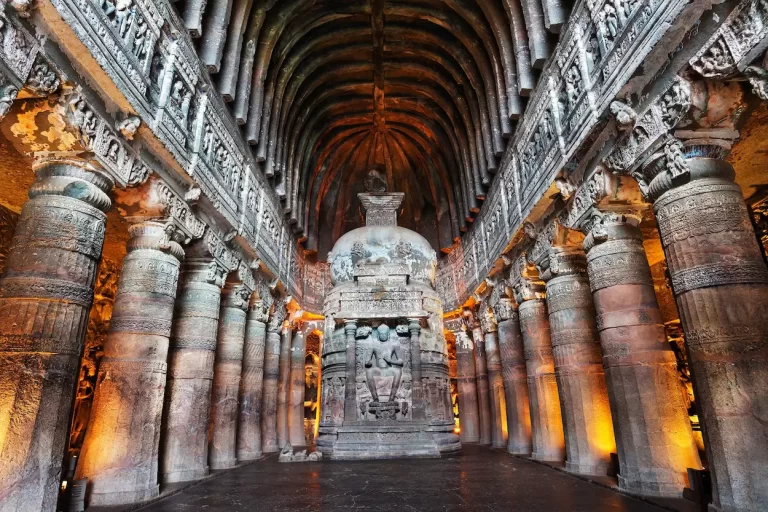
The paintings. This is low-light photography without flash, on a moving subject (you, handheld, in a cave with other visitors nearby), of a subject (ancient mineral pigment murals) that does not have the contrast or sharpness of modern painted surfaces. This is genuinely difficult photography that requires patience, stable hands, and realistic expectations.
Understanding which challenge you are working on at any given moment changes how you approach each cave.
Exterior Photography — Light, Timing and the Best Shots
The horseshoe panorama from the viewpoint:
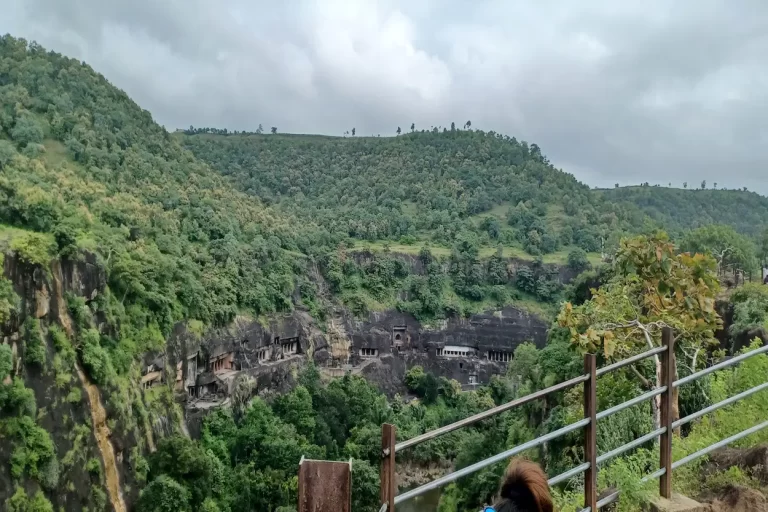
The viewpoint above the caves — reached via a path near Cave 1 — gives you the defining photograph of Ajanta: the full horseshoe cliff with all cave entrances visible, the Waghur River gorge below, the surrounding green hills. This is the shot. The best light for this shot is early morning — within the first hour after the site opens. The sun is low, the light is directional, and the gorge may still carry morning mist in monsoon and winter.
Best season for viewpoint photography:
- Winter (November–February) — golden morning light, clear air, no haze
- Monsoon (July–September) — green gorge, possible mist, dramatic overcast light
- Summer (March–June) — harsh light by mid-morning, shoot only in the first 30 minutes after opening
The cave facade close-ups:
Each cave entrance has carved relief detail above and around the doorway — decorative pilasters, figural panels, horseshoe chaitya arches. The best light for these close-ups is sidelight — when the sun is at a low angle and creates shadows inside the carved relief. This means early morning for caves facing east-northeast, and the first hour after opening for most facades.
Cave 26 facade:
The most photographically rewarding exterior at Ajanta. The carved horseshoe arch, the decorative pilasters, and the narrative relief panels around the doorway — all in one frame. Early morning light from the right angle creates deep shadow definition in the carved detail that disappears completely in flat midday light.
💡 Tip: The viewpoint is almost always empty because most visitors do not know it exists. Go there first — within 15 minutes of entering the site. You will have the definitive Ajanta panorama shot entirely to yourself. 👉 The Ajanta Private Day Tour includes the viewpoint in the morning route — it is built into the itinerary specifically because most visitors miss it.
Interior Photography — The Paintings
This is where Ajanta photography gets genuinely difficult — and genuinely rewarding.
The technical reality:
The fiber-optic lighting inside Ajanta caves is low-intensity by design. For photography, this means:
- Slow shutter speeds — camera shake is the primary enemy
- High ISO — expect grain, especially on older camera sensors
- No flash, no tripod — your only stabilization is your own steadiness
- Limited depth of field at the apertures needed for low light
What actually works:
Mobile phones (2023 onwards):
Modern smartphone cameras with night mode and computational photography handle Ajanta interiors surprisingly well. Night mode takes multiple exposures and combines them — the result in cave interiors is often cleaner than a DSLR at high ISO without a tripod. Hold your phone against the cave wall or a pillar for stabilization if you can.
DSLR / Mirrorless:
Set to the widest aperture your lens allows, ISO 1600–3200, and shutter speed as slow as you can hand-hold steadily (1/30s minimum for most people, 1/15s if you are disciplined). Image stabilization on the lens or body is significant in these conditions. Brace your elbows against your body and exhale before pressing the shutter.
What to photograph inside:
- Cave 1 — Bodhisattva Padmapani: The most reproduced image from Ajanta. The fiber-optic light on the left wall of the antechamber is the most consistent light source in Cave 1. Move slowly and find the angle where the light catches the jeweled crown without flaring.
- Cave 2 — Ceiling mandala: Stand in the center of the hall, point directly up, and use the widest angle you have. This is the one shot at Ajanta that genuinely requires a wider lens — a 16–24mm on full frame, or equivalent.
- Cave 16 — Dying Princess: The lowest light of any major cave at Ajanta. Give your eyes two full minutes to adjust before attempting to photograph. This panel rewards patience more than any other.
- Cave 17 — Visvantara Jataka panels: The narrative sequence panels in Cave 17 have more even fiber-optic coverage than most caves. Individual panels at moderate distance photograph more successfully here than in the tighter caves.
- Cave 26 — Parinirvana Buddha: The scale of the sculpture makes this the easiest major subject to photograph at Ajanta — wide angle, stable position, and the fiber-optic light is relatively even across the full length of the reclining figure.
💡 Tip: For interior shots, prioritize patience over quantity. Take three careful, stabilized frames of each subject rather than twenty rushed ones. Review on your screen immediately after shooting — if the first frame has camera shake, adjust before moving on. You cannot return for a reshoot.

The Viewpoint — Ajanta’s Best Photography Location
The viewpoint trail above the caves deserves its own section because it is the single most photographically significant location at Ajanta — and the one most commonly missed.
How to reach it:
From Cave 1, look for the path that continues upward along the cliff. The viewpoint is a short walk — 10 to 15 minutes up — and opens onto a platform above the cave level with an unobstructed view down into the horseshoe gorge.
What you can photograph from here:
- The full horseshoe cliff face with all 30 cave entrances visible
- The Waghur River below
- The surrounding green hills — particularly vivid in monsoon
- The scale relationship between the cave entrances and the full cliff height
Best time:
Early morning — within the first hour of the site opening. The gorge is in shadow, the upper cliff catches the first direct light, and the mist (in monsoon and winter) sits in the valley below. This is genuinely one of the great landscape-architecture photography shots available anywhere in India.
💡 Tip: In monsoon, the viewpoint path can be slippery. Wear your grip shoes and take your time on the ascent. The shot from the top is worth the 15-minute climb — but not if you rush it on wet rock.
Photography at Ajanta — Season by Season
Winter (November–February) — Best overall
Golden morning light, clear air, no haze on the gorge panorama. The low sun angle creates the best sidelight definition on carved cave facades. Cool temperatures make the full-day photography session comfortable.
Monsoon (July–September) — Best for drama
The green gorge, possible mist in the valley, dramatic overcast light that diffuses shadows on the cliff face. Overcast monsoon light is actually excellent for exterior cave facade photography — no harsh shadows, even illumination across carved relief. Interior photography is unaffected by season.
Summer (March–June) — Challenging
Harsh overhead light by 10:00 AM kills the exterior shot quality. The only viable exterior photography window in summer is the first 45 minutes after opening. Interior photography is unaffected.
The Alternative — Photography With a Guide Who Knows the Light
Knowing which cave has the best fiber-optic coverage for your lens, which angle on the Bodhisattva Padmapani catches the light without flare, and exactly when to be at the viewpoint for the morning gorge shot — this is local knowledge that takes multiple visits to build.
A private guided tour means your guide has made these decisions hundreds of times. The viewpoint is timed correctly. Cave 1 is entered at the right moment in the morning. Cave 16 is given the time it needs. You spend your energy on photography, not on logistics.
👉 See Ajanta Private Day Tour Details & Book — early start, viewpoint included, guide who knows the light at every cave.
FAQ — Ajanta Caves Photography
Q.1 : Is photography allowed inside Ajanta Caves?
Yes — still photography with mobile phones and cameras is allowed inside Ajanta Caves with no additional fee. Flash photography is strictly prohibited inside all caves — ASI security enforces this at every cave entrance. Tripods are also prohibited inside the caves. Turn your flash off before entering the site.
Q.2 : What camera settings work best for Ajanta Caves interiors?
For DSLR or mirrorless cameras: widest available aperture, ISO 1600–3200, and the slowest shutter speed you can hand-hold steadily (1/30s minimum). Brace your elbows against your body and exhale before pressing the shutter. Modern smartphones with night mode perform surprisingly well in Ajanta interiors — often better than a handheld DSLR at high ISO.
Q.3 : What is the best time for photography at Ajanta Caves?
Early morning — within the first hour after 9:00 AM opening — is the best time for exterior and viewpoint photography. The light is directional, the gorge may carry mist, and the cave facades are empty of crowds. Interior photography is less time-dependent since the fiber-optic lighting is consistent throughout the day, but early morning means no crowd movement behind you while you shoot.
Q.4 : Where is the Ajanta Caves viewpoint and how do I reach it?
The viewpoint is reached via a path that continues upward from near Cave 1. The walk takes approximately 10–15 minutes and opens onto a platform above the cave level with an unobstructed view of the full horseshoe cliff, the Waghur River, and the surrounding gorge. Most visitors miss it entirely — it is not prominently marked.
Q.5 : Can I use a tripod at Ajanta Caves?
No — tripods are strictly prohibited inside all caves at Ajanta. On the exterior pathway, a small tabletop tripod or gorilla pod may be used discreetly for specific exterior shots, but this is at the discretion of the ASI guards present. For interior shots, stabilize against cave walls or pillars where possible, or rely on image stabilization and good hand-hold technique.
👉 Related Posts You Might Like:
- Best Caves Inside Ajanta – Cave 1, 2, 16, 17 and 26 Explained
- Ajanta Caves at Sunrise – Early Morning Entry Guide
- Ajanta Caves in Monsoon – Is It Really Worth Visiting?
- What to Wear at Ajanta Caves – Dress Code & Tips
- Ajanta Caves for Solo Travelers – Complete Honest Guide